AirWatch/VMware Workspace ONE Installation
AirWatch does not provide an easy way to upload the entire Cyberhaven configuration profile. You may be able to upload it using this tool.
Another method, which will be described in detail in this article, is based on copy-pasting parts of the provided Cyberhaven configuration profile into WS1, so that profile creation is somewhat automated.
-
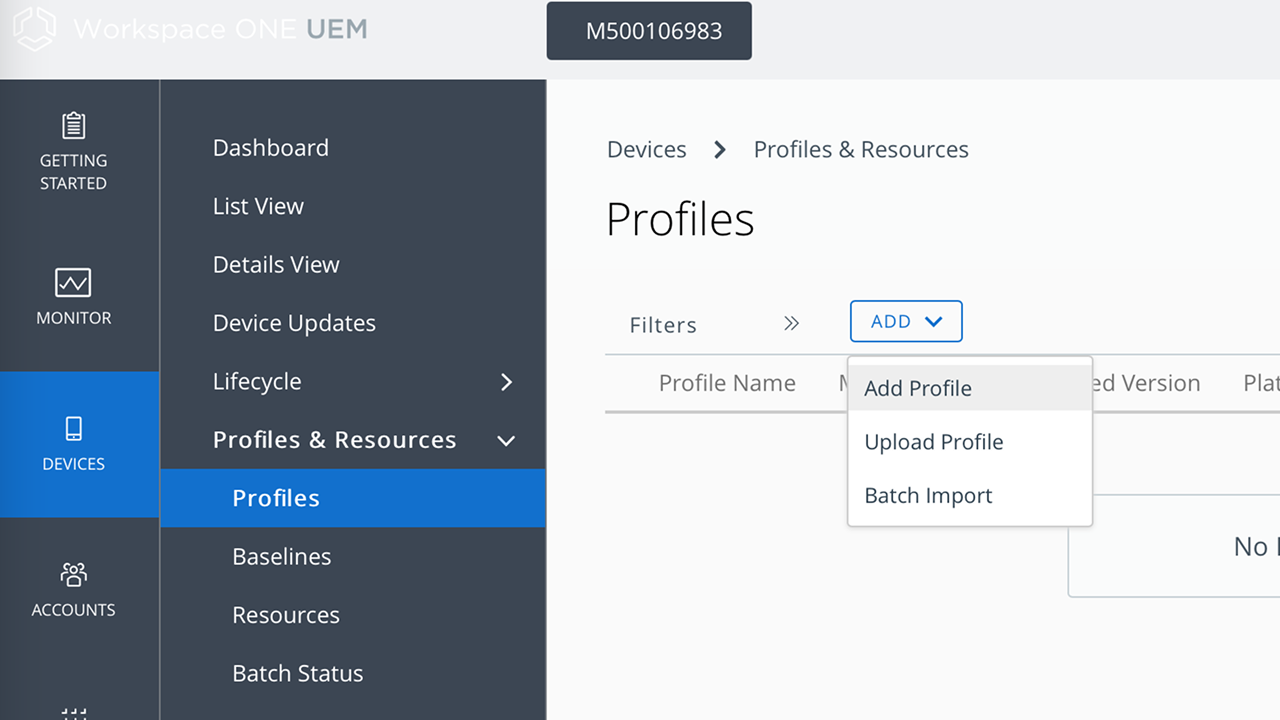
Create the following privacy preferences policy control in Workspace ONE by going to Devices > Profiles and clicking ADD > Add profile.
-
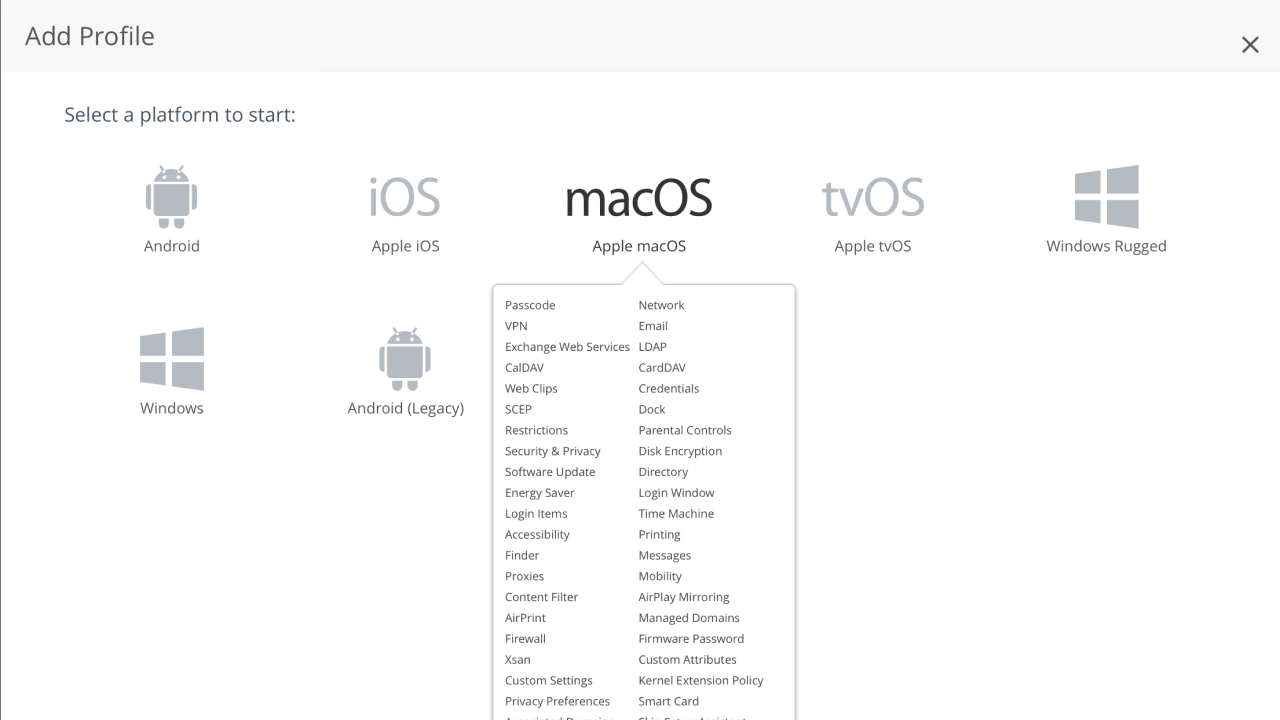
Select macOS.
-
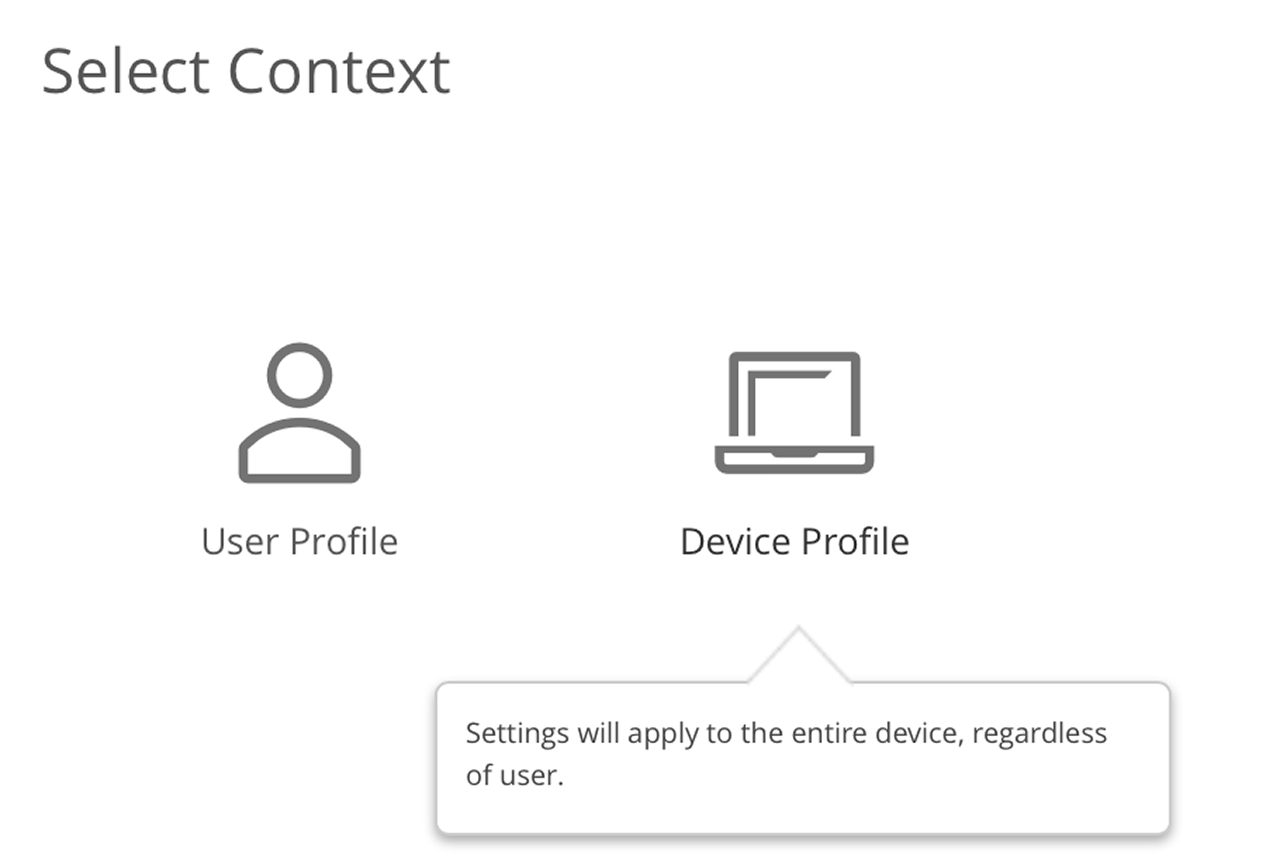
Select Device Profile.
-
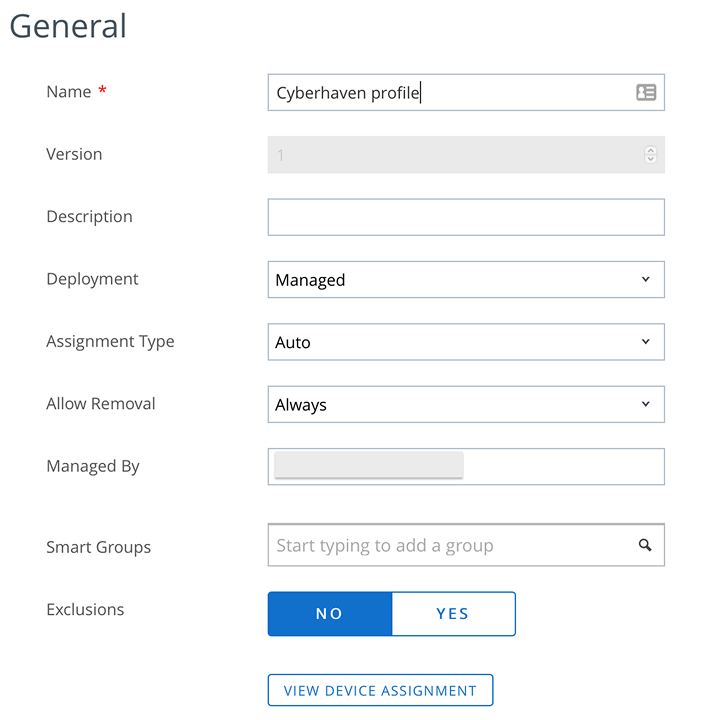
Give it a name (e.g., "Cyberhaven profile"), and assign it to your target users group.
-
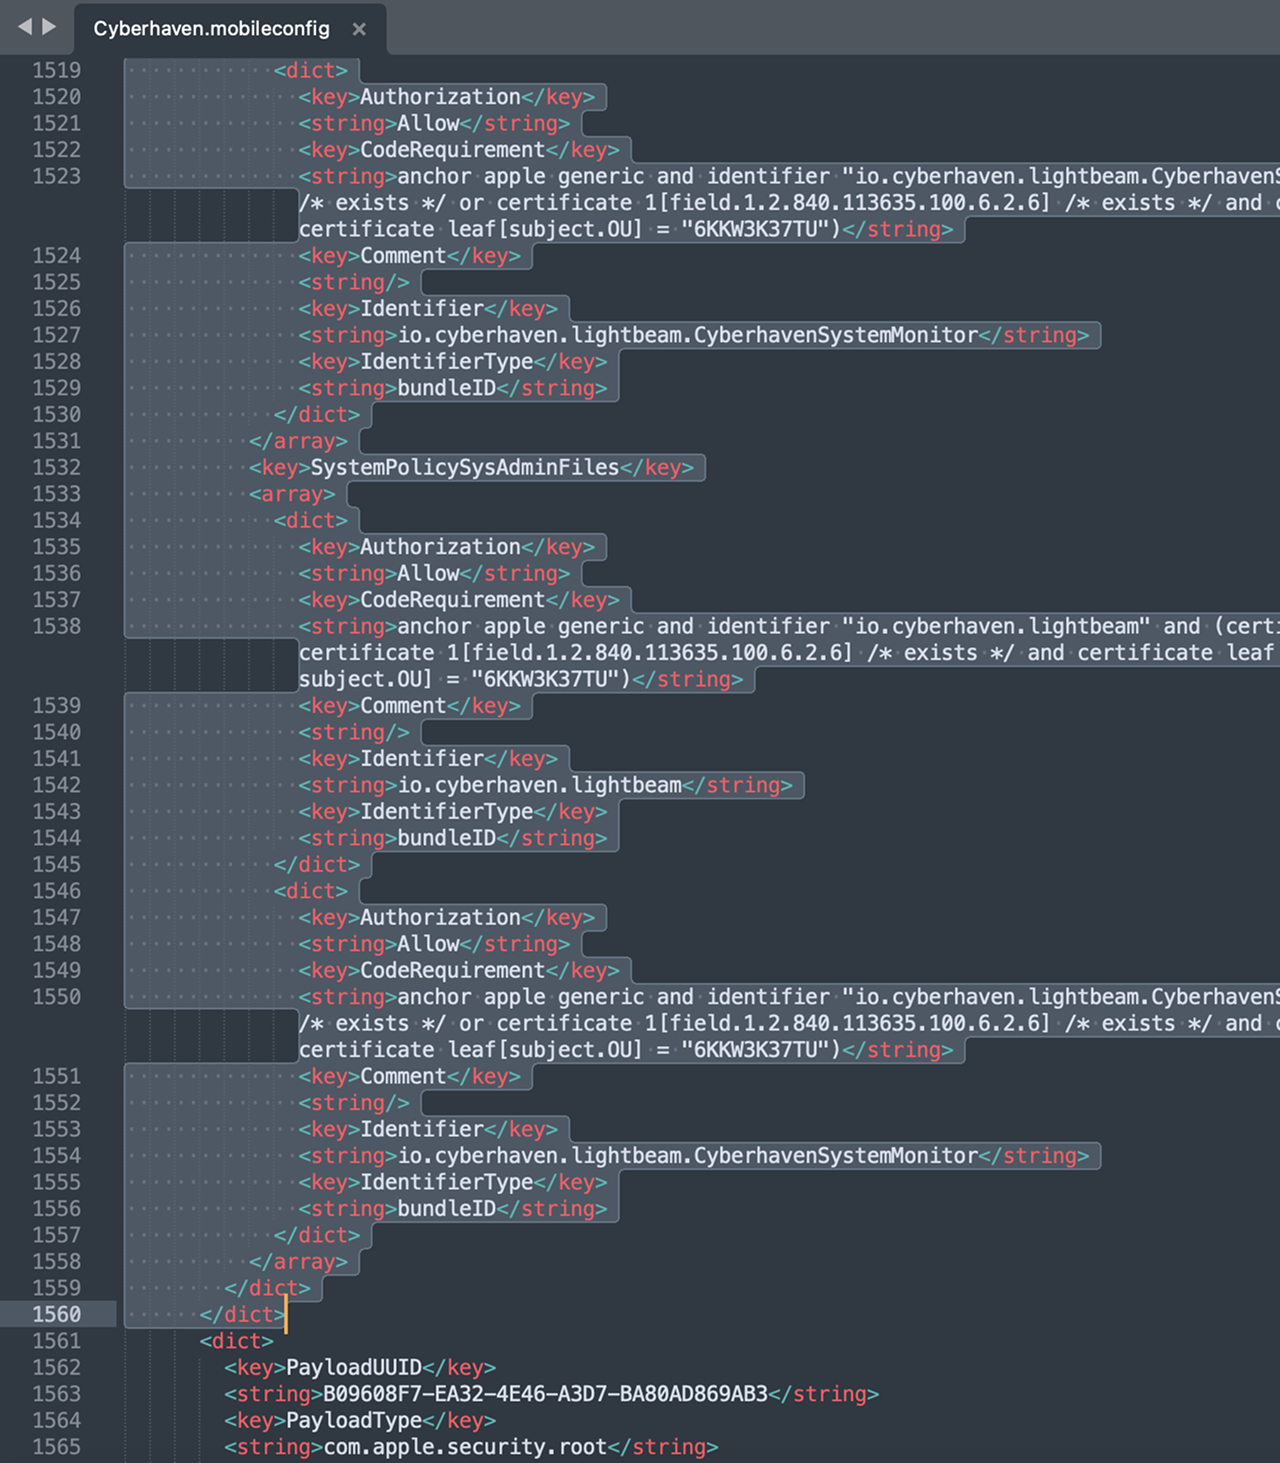
Open the Cyberhaven configuration profile you downloaded from the Cyberhaven dashboard in a text editor. Copy the privacy settings, starting from the selected portion shown below:

and ending here (lines 27–1560).
-
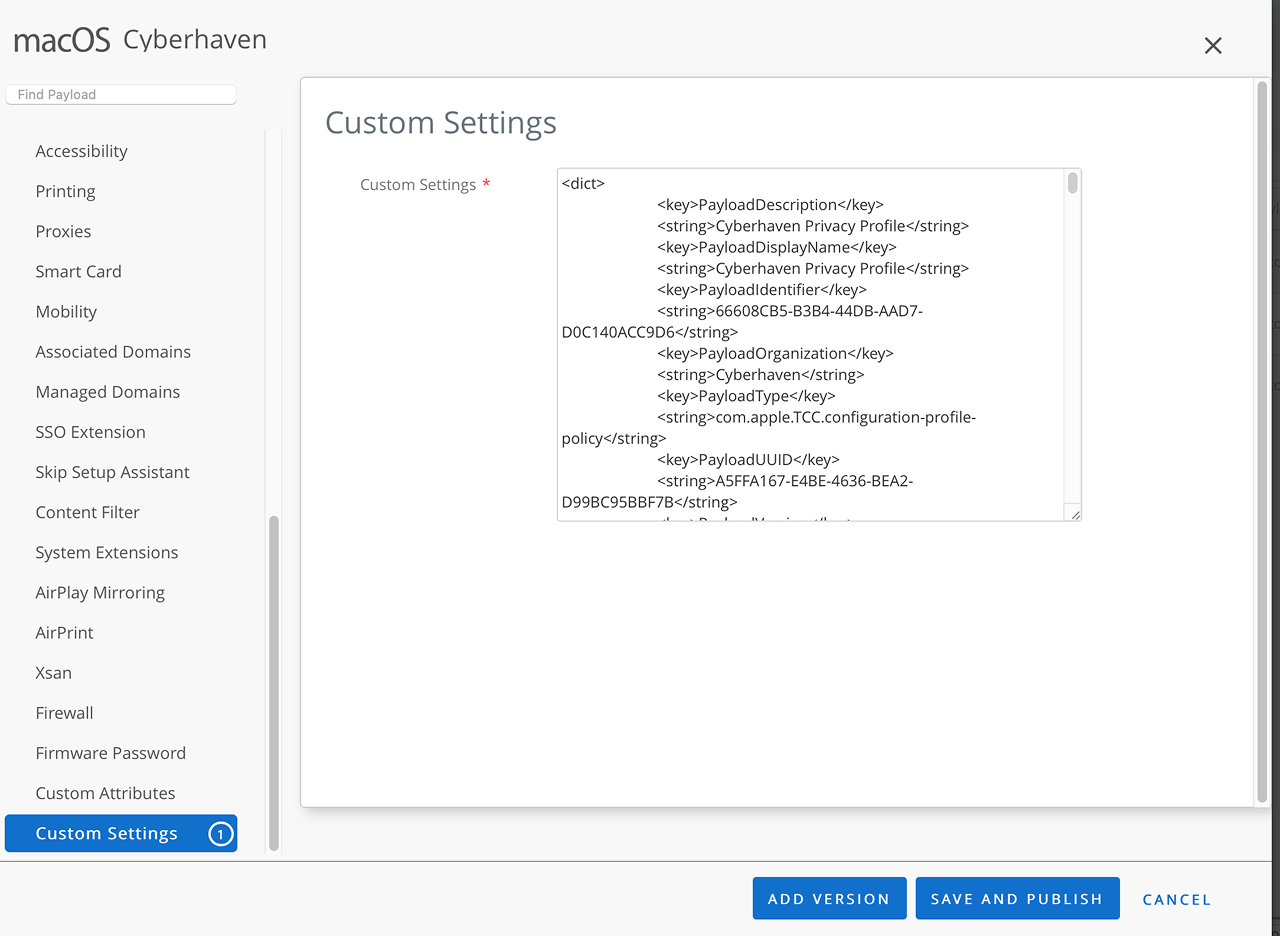
Paste this into a Customs Settings field in the profile.
-
To create a second profile, this time to add the Cyberhaven application settings, start by adding a new profile as described in steps 1 through 4.
-
Copy the
mcxsection from the Cyberhaven configuration profile (lines 1587–1627).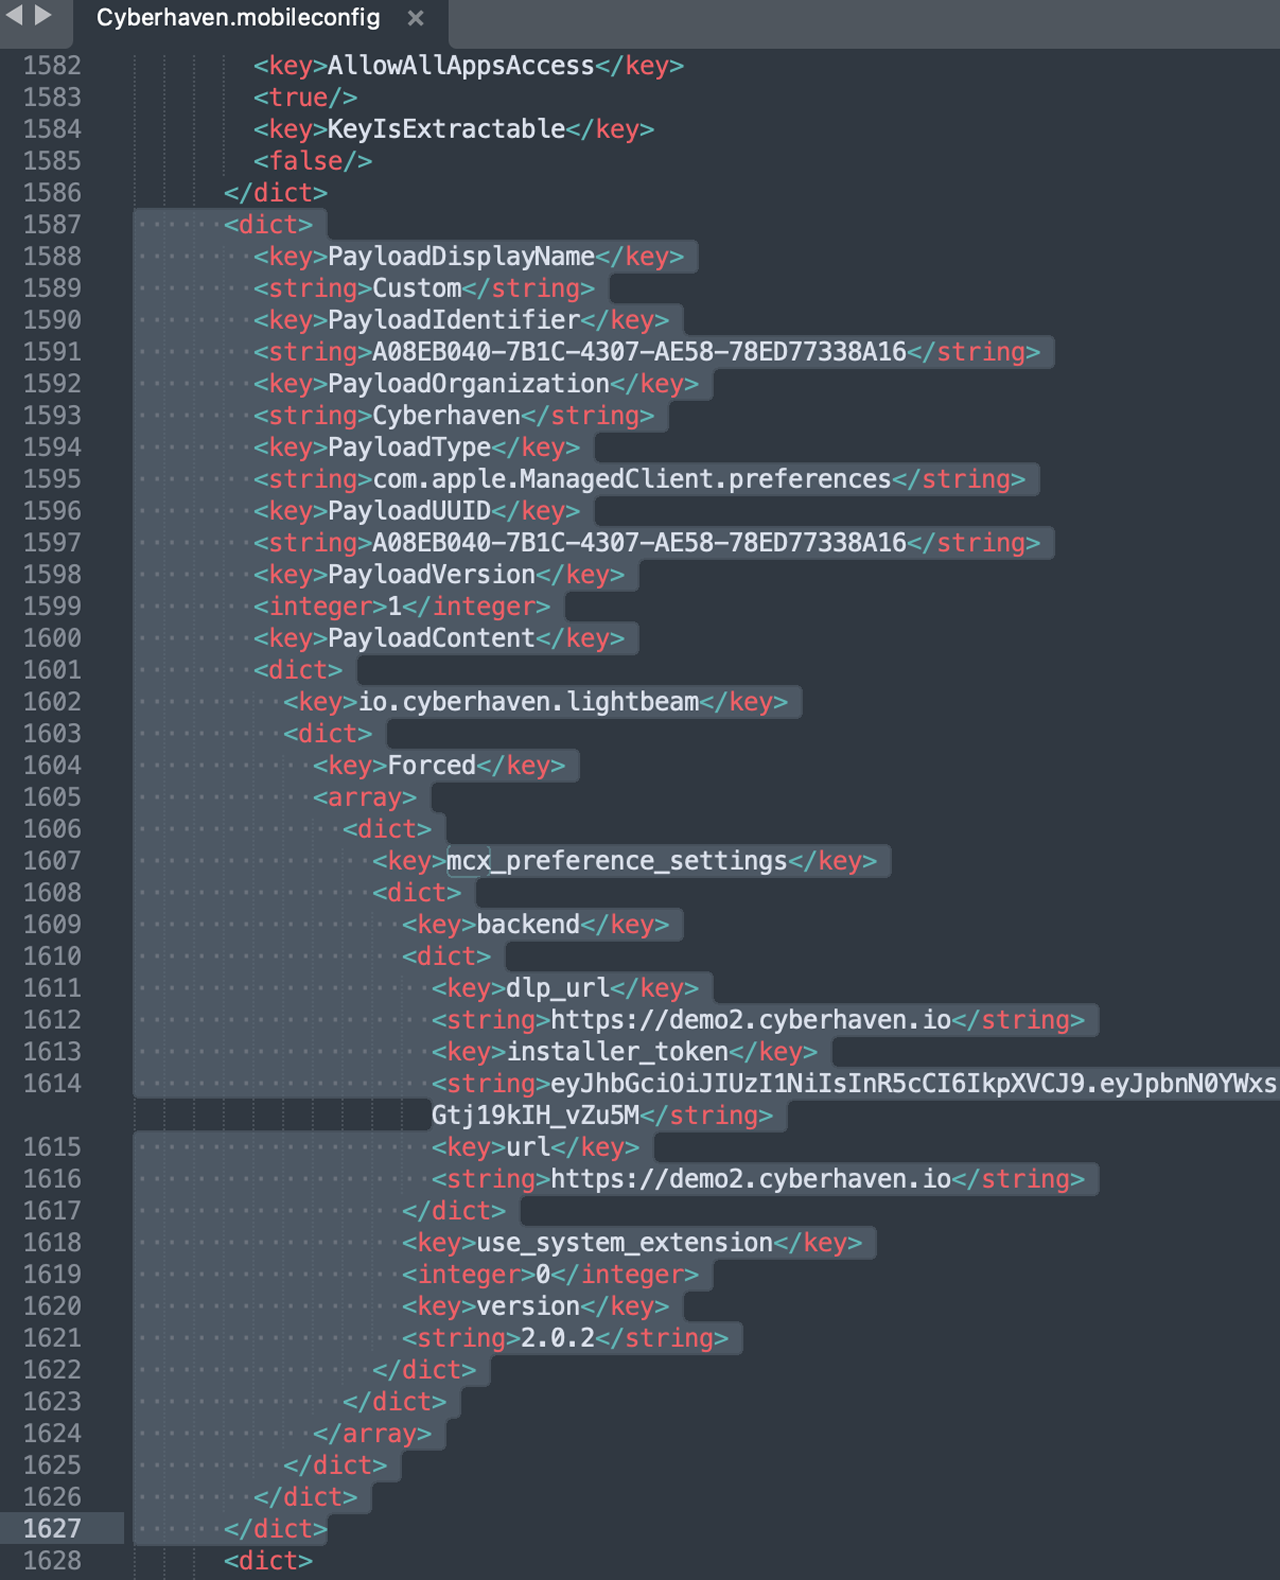
-
Paste this into the Custom Settings section of the second profile.
-
Now you can deploy these two profiles to all target users, wait for the deployment to be complete.
-
After all users had successfully installed the profile, upload the Cyberhaven agent and deploy it to the same group.
Known Issue: VPN Configuration Prompt
Some MDM solutions may prompt for a VPN hostname when uploading the Cyberhaven MDM profile (version 2.0.8 or later), due to the inclusion of inline proxy support for Microsoft Teams traffic inspection. If prompted, enter 127.0.0.1 as the VPN hostname to proceed with the upload. For details about Microsoft Teams support, see Microsoft Teams Support with Windows and macOS Sensors